The WSL( Windows Subsystem for Linux ) helps developers to run a GNU/Linux environment along with its utilities, command-line tools, and application directly on Windows, without the help of traditional methods like a virtual machine or dual-boot setup.
What’s new in WSL 2?
- WSL 2 is a new version of the Windows Subsystem for Linux architecture that helps to run Linux distribution on Windows natively (using a lightweight virtual machine).
- WSL 2 is the upgraded version of WSL1 (the current widely available version). Its primary goal is to increase file system performance and add a full system call compatibility.
- Linux distributions can be run with either the WSL 1 or WSL 2 architecture and can be upgraded or downgraded at any time.
Before you install WSL 2, let’s check whether your system can run it or not.
- If you have an x64 system: Version 1903 or higher, with Build 18362 or higher.
- If you have an ARM64 system: Version 2004 or higher, with Build 19041 or higher.
- WSL 2 do not support Builds lower than 18362
NOTE
To check your version and build number, select Windows logo key + R, type winver, select OK.
Getting started on windows
Step 1: Enable the WSL ( Windows Subsystem for Linux )
- Open Command Prompt or PowerShell and run it as administrator
- Enter and execute this command –
dism.exe /online /enable-feature /featurename:Microsoft-Windows-Subsystem-Linux /all /norestart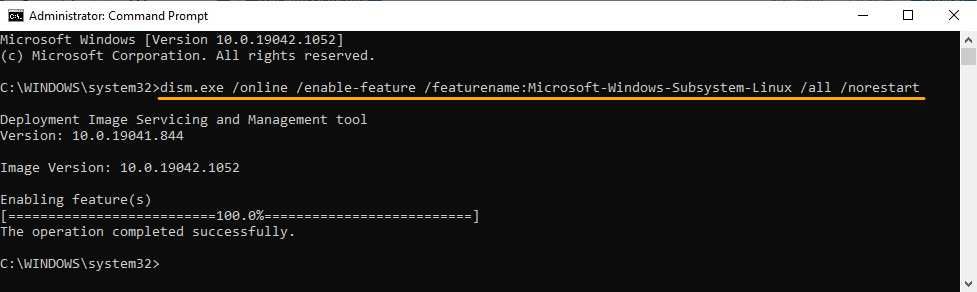
Step 2: Enable the Virtual Machine Platform
- To enable Virtual Machine Platform execute this command next-
dism.exe /online /enable-feature /featurename:VirtualMachinePlatform /all /norestart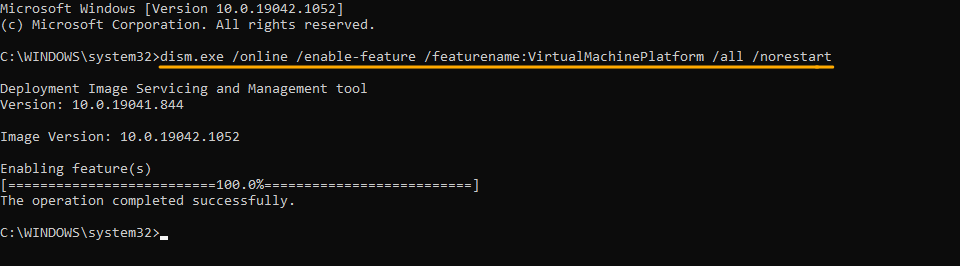
Restart your computer to complete the WSL install.
Step 3: Download the Linux kernel update package
- Download the latest package from here: WSL2 Linux kernel update package for x64 machines
Install the package.
NOTE: If you’re using an ARM64 machine, then download the ARM64 package instead. If you’re not sure what kind of machine you have, open Command Prompt or PowerShell and enter:
systeminfo | find "System Type".
Step 4: Setting WSL 2 as your default version
Now in your Command Prompt, enter this code:
wsl --set-default-version 2Step 5: Install Linux distribution
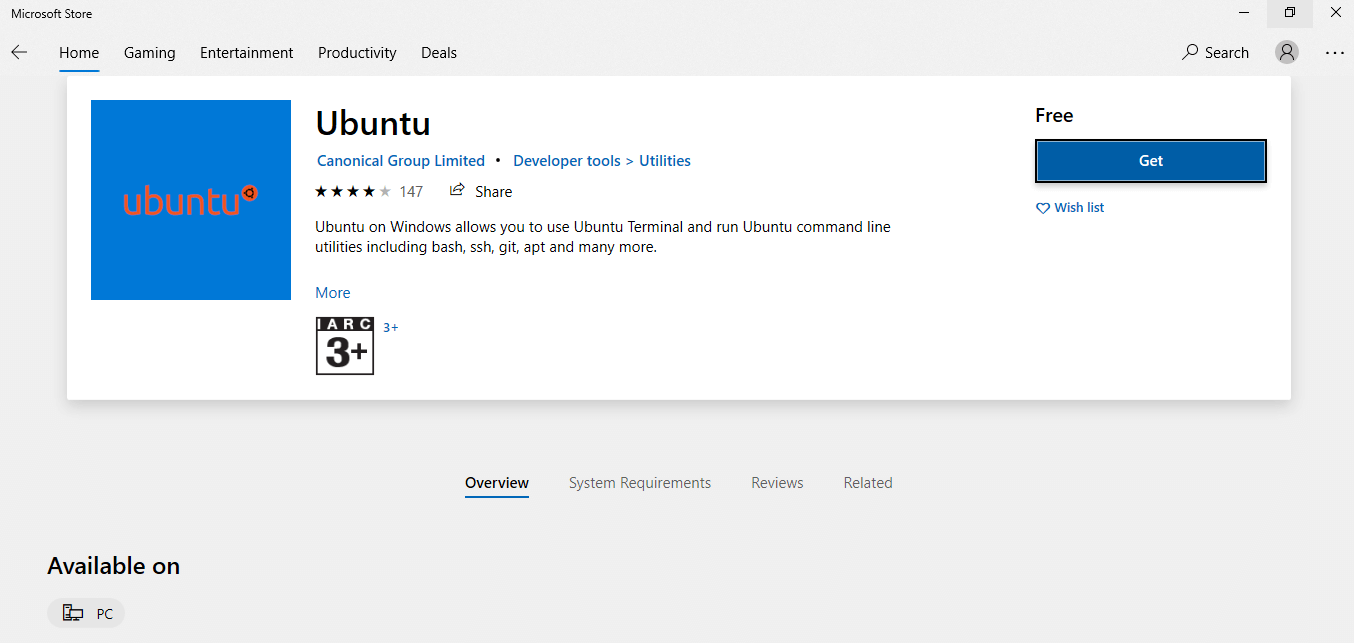
- Open Microsoft Store and install any Linux distribution of your choice.
The first time you launch installed Linux distribution, you’ll be asked to wait for a minute or two for files to be stored on your PC. In the future, launches should take less than a second.
You will be asked to create a user account and password for the Linux distribution( Make sure to write down the password somewhere in case you forget it ).

CONGRATULATIONS! You’ve successfully integrated your Linux distribution with your Windows operating system!
Step 6: Checking the WSL Version
You can check the WSL version by entering this command in your cmd.
wsl --list --verbose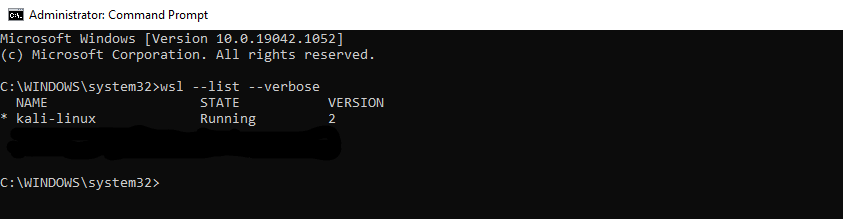
In Case your wsl version is set to 1, you can change it by running this command :
wsl --set-version <distribution name> <versionNumber> Replace <distribution name> with the name of your distribution and <versionNumber> with the number ‘2’ or vice versa.
In case you get any error while doing any of the steps mention above. Worry not and follow this Troubleshooting Installation Guide for solutions.
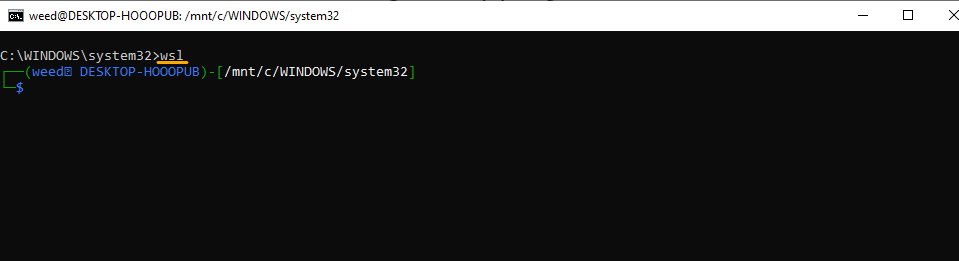
Step 7: To get into your Linux distribution
Open command prompt and run command – wsl
Take a closer look! The current path is pointing to your Windows User Directory.
Now, it is recommended to store source code and other bind-mounted data into Linux containers in the Linux file system rather than the Windows file system.
So, execute the command – ” cd ~ ” to get into the Linux User Directory.
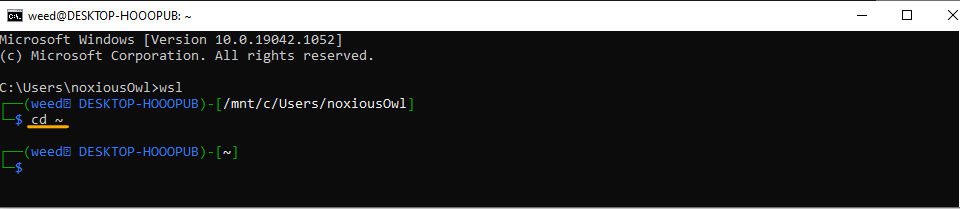
WELL DONE! You are all set!
Thank You for reading till the end. If you find this article useful, don’t forget to save it and share it with your friends.