
Table of Contents
What is a session in php?
About the project
File Structure
I have attached a screenshot below for the files used in this login system. The files are-
index.php is the landing page that the user interacts with first.
header.php and footer.php: The files contain the header scripts such as title, links to CSS, and icon CDN.
database.php contains the script that connects the database with the frontend.
login.php is the login page where users can log in, and the file also holds the php login scripts required for login.
Another file is register.php, where a user can register himself. The file contains the php code required for registration.
dashboard.php, this page is only visible to logged-in users. It holds the script for session authentication and logout script. This file shows the logged-in user details.
Frontend for the PHP login system
First, create a front/landing page on which a user will interact. And name it index.php. It is optional and, you can start with the login page front end.
<?php include "header.php" ?>

<h2 class="text-center mt-3">LOGIN System with PHP Session</h2>
<hr>

<div class="container">
  <div class="row">

    <div class="col">
      <div class="card text-center">
        <div class="card-header">
          <h3 class="card-title">Login</h3>
        </div>
        <div class="card-body">
          <a href="login.php"> <img src="images/login.jpg" alt="login image" width="53%" height="53%"></a>
          <p class="card-text text-muted">Never share your password with anyone.</p>
          <a href="login.php" class="btn btn-primary"> Sign In</a>
        </div>
      </div>
    </div>

    <div class="col">
      <div class="card text-center">
        <div class="card-header">
          <h3 class="card-title">Register</h3>
        </div>
        <div class="card-body">
          <a href="login.php"><img src="images/registration.png" alt="register image" width="54%" height="54%"></a>
          <p class="card-text text-muted">Always use different password for different site.</p>
          <a href="register.php" class="btn btn-primary"> Sign Up </a>
        </div>
      </div>
    </div>

  </div>
</div>

<?php include "footer.php" ?> 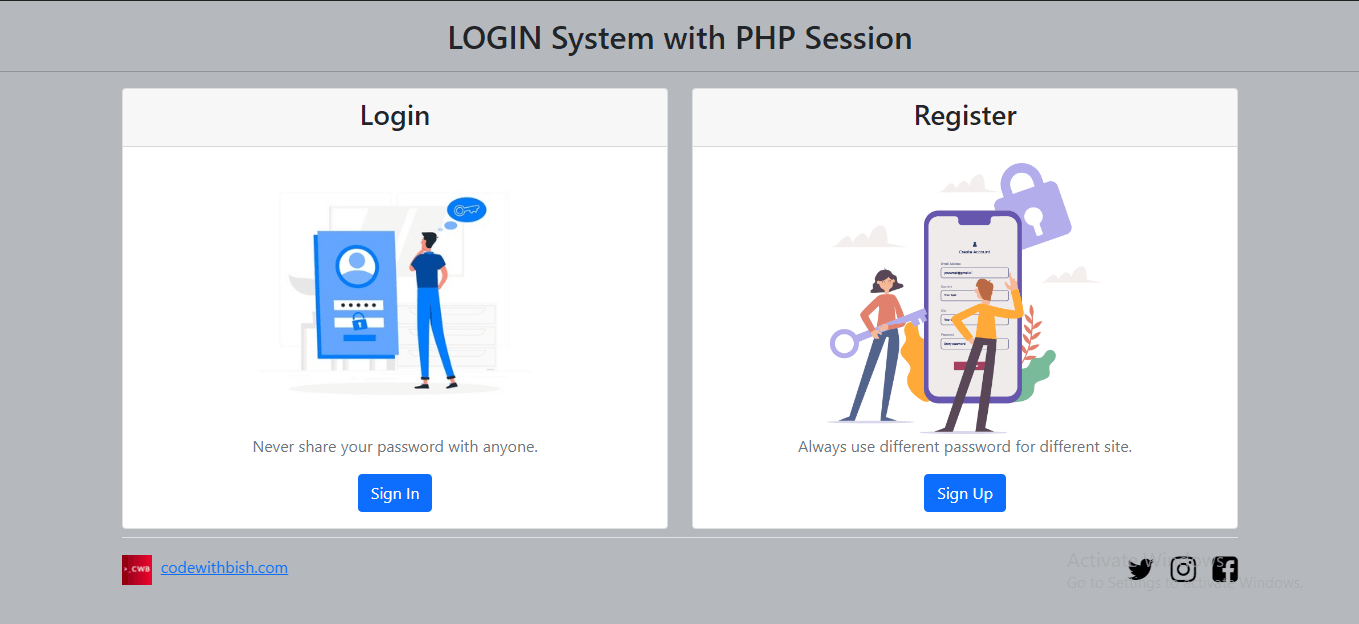
We will create header and footer pages to add these to other pages when required and avoid rewriting the same code repeatedly. So, create a file header.php and add the following code.
header.php
<?php include 'database.php'; ?>
<!DOCTYPE html>
<html lang="en">
<head>
    <meta charset="UTF-8">
    <meta http-equiv="X-UA-Compatible" content="IE=edge">
    <meta name="viewport" content="width=device-width, initial-scale=1.0">
    <title>Login System</title>

    <!-- Bootstrap CSS -->
    <link href="https://cdn.jsdelivr.net/npm/[email protected]/dist/css/bootstrap.min.css" rel="stylesheet" integrity="sha384-KyZXEAg3QhqLMpG8r+8fhAXLRk2vvoC2f3B09zVXn8CA5QIVfZOJ3BCsw2P0p/We" crossorigin="anonymous">

    <!-- Font Awesome Icons -->
    <link rel="stylesheet" href="https://cdnjs.cloudflare.com/ajax/libs/font-awesome/4.7.0/css/font-awesome.min.css">

</head>
<body class=' bg-secondary text-dark' style='--bs-bg-opacity: .5;'>
footer.php
<div class="container fixed-bottom ">
<footer class="d-flex flex-wrap justify-content-between align-items-center py-3 my-4 border-top">
<div class="col-md-4 d-flex ">
<a href="https://codewithbish.com" target="_blank" rel="noopener noreferrer"><img src="images/cwb_logo.png" alt="logo" width="30" height="30"> </a>
<span class="text-muted"> <a href="https://codewithbish.com/">codewithbish.com</a> </span>
</div>
<ul class="nav col-md-4 justify-content-end list-unstyled d-flex">
<li class="ms-3"><a class="text-muted" href="https://twitter.com/codewithbish" target="_blank"><i class="fa fa-twitter" style="font-size:30px; color:black;" ;></i></a></li>
<li class="ms-3"><a class="text-muted" href="https://www.instagram.com/codewithbish/" target="_blank"><i class="fa fa-instagram" style="font-size:30px; color:black;" ;></i></a></li>
<li class="ms-3"><a class="text-muted" href="https://www.facebook.com/codewithbish" target="_blank"><i class="fa fa-facebook-square" style="font-size:30px; color:black;" ;></i></a></li>
</ul>
</footer>
</div>
</body>
</html> Login.php
Create an HTML form that takes the user input. The input fields are email and password.
<div class="container col-4 border rounded bg-light mt-5" style='--bs-bg-opacity: .5;'>
  <h1 class="text-center">Sign In</h1>
  <hr>
  <form action="" method="post">
    <div class="mb-3">
      <label for="email" class="form-label">Email ID</label>
      <input type="email" class="form-control" name="email" placeholder="Enter your email" autocomplete="off" required>
      <small class="text-muted">Your email is safe with us.</small>
    </div>
    <div class="mb-3">
      <label for="password" class="form-label">Password</label>
      <input type="password" class="form-control" name="password" placeholder="Enter your password" required>
      <small class="text-muted">Do not share your password.</small>
    </div>
    <div class="mb-3">
      <input type="submit" name="signin" value="Sign In" class="btn btn-primary">
    </div>
  </form>
</div> 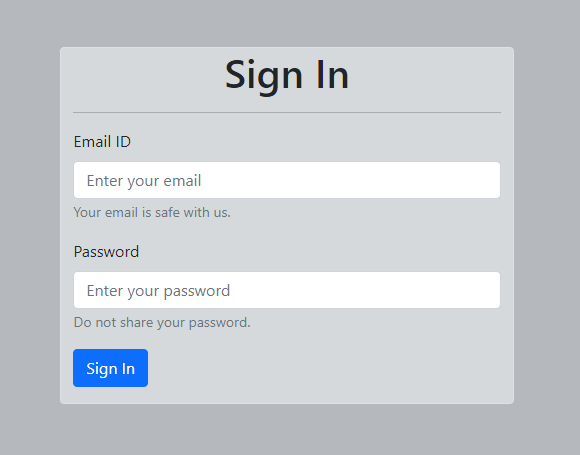
register.php
create an HTML register form that takes the user data such as username, email, and password.
<div class="container col-4 border rounded bg-light mt-5" style='--bs-bg-opacity: .5;'>
  <h1 class="text-center">Sign Up</h1>
  <hr>
  <form action="" method="post">
    <div class="mb-3">
      <label for="name" class="form-label">Username</label>
      <input type="text" class="form-control" name="name" placeholder="Enter your name" autocomplete="off" required>
    </div>
    <div class="mb-3">
      <label for="email" class="form-label">Email ID</label>
      <input type="email" class="form-control" name="email" placeholder="Enter your email" autocomplete="off" required>
      <small class="text-muted">Your email is safe with us.</small>
    </div>
    <div class="mb-3">
      <label for="password" class="form-label">Password</label>
      <input type="password" class="form-control" name="password" placeholder="Enter your password" required>
      <small class="text-muted">Do not share your password.</small>
    </div>
    <div class="mb-3">
      <input type="submit" name="signup" value="Sign Up" class="btn btn-primary">
    </div>
  </form>
</div> 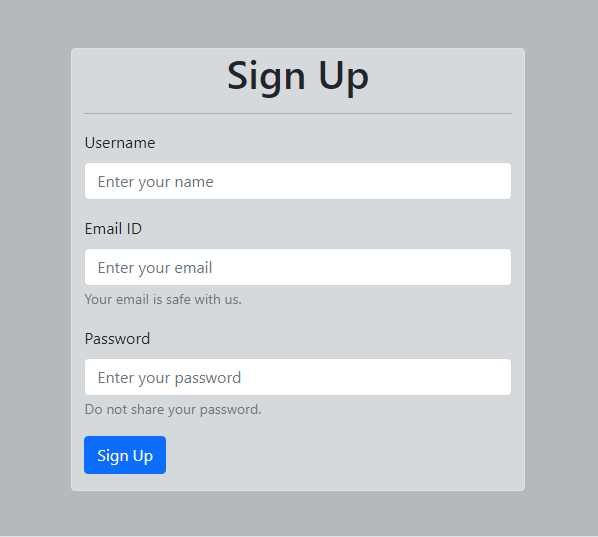
dashboard.php
This page is only accessible to those users that have successfully logged in. The page will redirect to the login page whenever a user tries to access this page directly. The dashboard page displays the logged-in user details.
<div class="container col-12 border rounded mt-3">
  <h1 class=" mt-3 text-center">Welcome, This your dashboard!! </h1>
  <hr>
  <h4> <?php echo $_SESSION['name']; ?> </h4>

  <table class="table table-striped table-bordered table-hover">
    <thead class="table-dark">
      <tr>
        <th scope="col">ID</th>
        <th scope="col">Username</th>
        <th scope="col">Email</th>
      </tr>
    </thead>
    <tbody>
      <tr>
        <td> <?php echo $_SESSION['id']; ?></td>
        <td> <?php echo $_SESSION['name']; ?></td>
        <td> <?php echo $_SESSION['email']; ?></td>
      </tr>
    </tbody>
  </table>

  <form action="" method="post">
    <button type="submit" name='signout' class=" btn btn-warning mb-3"> Sign Out</button>
  </form>
</div>

Database Conectivity
Now Let’s set up our database
CREATE TABLE users(
    ID int NOT NULL AUTO_INCREMENT,
    username VARCHAR(255) NOT NULL,
    email VARCHAR(255) NOT NULL,
    password VARCHAR(255) NOT NULL,
   PRIMARY KEY (ID)
);
Now let’s connect our database with the frontend. Add this script to your database.php file.
<?php
    $host= 'localhost';
    $user= 'root';
    $password = "";
    $database = 'loginsystem';

    $conn = mysqli_connect($host,$user,$password,$database);

    if (!$conn) {
        die("Connection failed: " . mysqli_connect_error());
      }

?> PHP Code
PHP code for login process
The PHP isset() function checks whether the user has requested the login or not.
Then it takes the details and compares them with the user database. If the user doesn’t exist, it displays an appropriate message and prompts to enter the details again.
When login is successful, the code sets the logged-in user session and directs the user to the dashboard page.
<?php session_start(); ?>
<?php include "header.php" ?>
<?php

if (isset($_POST['signin'])) {
  $email = $_POST['email'];
  $password = $_POST['password'];

  $query = "SELECT * from users WHERE email = '$email' AND password = '$password'";
  $user = mysqli_query($conn, $query);

  if (!$user) {
    die('query Failed' . mysqli_error($conn));
  }

  while ($row = mysqli_fetch_array($user)) {

    $user_id = $row['ID'];
    $user_name = $row['username'];
    $user_email = $row['email'];
    $user_password = $row['password'];
  }
  if ($user_email == $email  &&  $user_password == $password) {

    $_SESSION['id'] = $user_id;       // Storing the value in session
    $_SESSION['name'] = $user_name;   // Storing the value in session
    $_SESSION['email'] = $user_email; // Storing the value in session
    //! Session data can be hijacked. Never store personal data such as password, security pin, credit card numbers other important data in $_SESSION
    header('location: dashboard.php?user_id=' . $user_id);
  } else {
    header('location: login.php');
  }
}
?>
PHP code for register process
The registration process is simple. It takes the user input and stores the data into the database. If the data is successfully stored in the database, it redirects the user to the login page, else displays an error message.
<?php include "header.php" ?>
<?php
if (isset($_POST['signup'])) {
  $name = $_POST['name'];
  $email = $_POST['email'];
  $password = $_POST['password'];

  $query = "INSERT INTO users(username,email,password) VALUES('{$name}','{$email}','{$password}')";
  $addUser = mysqli_query($conn, $query);

  if (!$addUser) {
    echo "Something went wrong" . mysqli_error($conn);
  } else {
    header('location: login.php');
  }
}
?>
PHP code for dashboard
<?php session_start();       // Start the session ?>
<?php include "header.php" ?>

<?php
if (!isset($_SESSION['id'])) {         // condition Check: if session is not set.
  header('location: login.php');   // if not set the user is sendback to login page.
}
?> <?php
if (isset($_POST['signout'])) {
session_destroy(); // destroys session
header('location: index.php');
}
?> Download the Source Code
Conclusion
It is a simple example of a login system with a PHP session. Note that the code doesn’t have the validation script for either login or register. You can add and set your own validation rules for the login and register. Download the code and make your own changes to make it yours.

Intuitive Post. Beginners can easily develop much interest in learning php with your posts Sir, Please keep us updated with more posts.
In addition I would like to point out to some little error here, You did not add database file in the download except one has to create the database and table columns.
Secondly: Their is error in register.php we have (name) on the db column instead of (username), Please check and reupdate.
// $query = “INSERT INTO users(name,email,password) VALUES(‘{$name}’,'{$email}’,'{$password}’)”;
Thanks
Thank you for taking your time and pointing out the error. I have updated the code and added the database file. I will post more helpful articles like this.
Hello,
I tried to use this great script but I get always this error while trying to start the register or login from the index.php out of the zip
register warning:
Warning: Cannot modify header information – headers already sent by (output started at /xxxx/loginsystem/header.php:2) in /xxxx/loginsystem/register.php on line 14
login warning
Warning: Undefined array key “name” in /xxxx/loginsystem/login.php on line 19 Warning: Cannot modify header information – headers already sent by (output started at /xxxx/loginsystem/header.php:2) in /xxxx/loginsystem/login.php on line 29
where is my mistake, I just changed the database.php with my login and I renamed the database table from users to gutschein (in the register.php and login.php and also in the database)
I would be glad to here from you
Thanks
Hello Michael,
For Login warning:- “Warning: Undefined array key “name” in /xxxx/loginsystem/login.php on line 19 Warning”
change the $user_name = $row[‘name‘]; to $user_name = $row[‘username‘];
As for the other warnings(Cannot modify header information), I didn’t see those warnings in the login system code as I was testing the code.
But I am sharing 2 links that might help solve the issue you are facing.
StackOverflow:- https://stackoverflow.com/questions/8028957/how-to-fix-headers-already-sent-error-in-php
digitalpbk :- http://digitalpbk.com/php/warning-cannot-modify-header-information-headers-already-sent
I’m disappointed you did not cover in more how to handle the posting of the registration form data and the validation of the password input for passing through to the dashboard if successful. I did not see inclusion of the proper way to post new user info to the database after registration.
After login the page doest redirect to the dashboard.php but when i put the dashboard.php at the end of the url it shows the dashboard, where is the mistake in the redirect.
Make sure you have session_start(); at the beginning of your “dashboard.php” file.
check for this code – Dashboard PHP code
You should not be able to access the dashboard page directly, kindly recheck the code.
Is it secure enough to use in a production project (very small scale)?
While the tutorial provides a basic understanding, I would suggest to incorporate additional security measures, such as parameterized queries and password hashing, for a production-level implementation.
No back-end validation == very, very insecure. It must validate server-side otherwise you are trusting the end user to validate the input data.