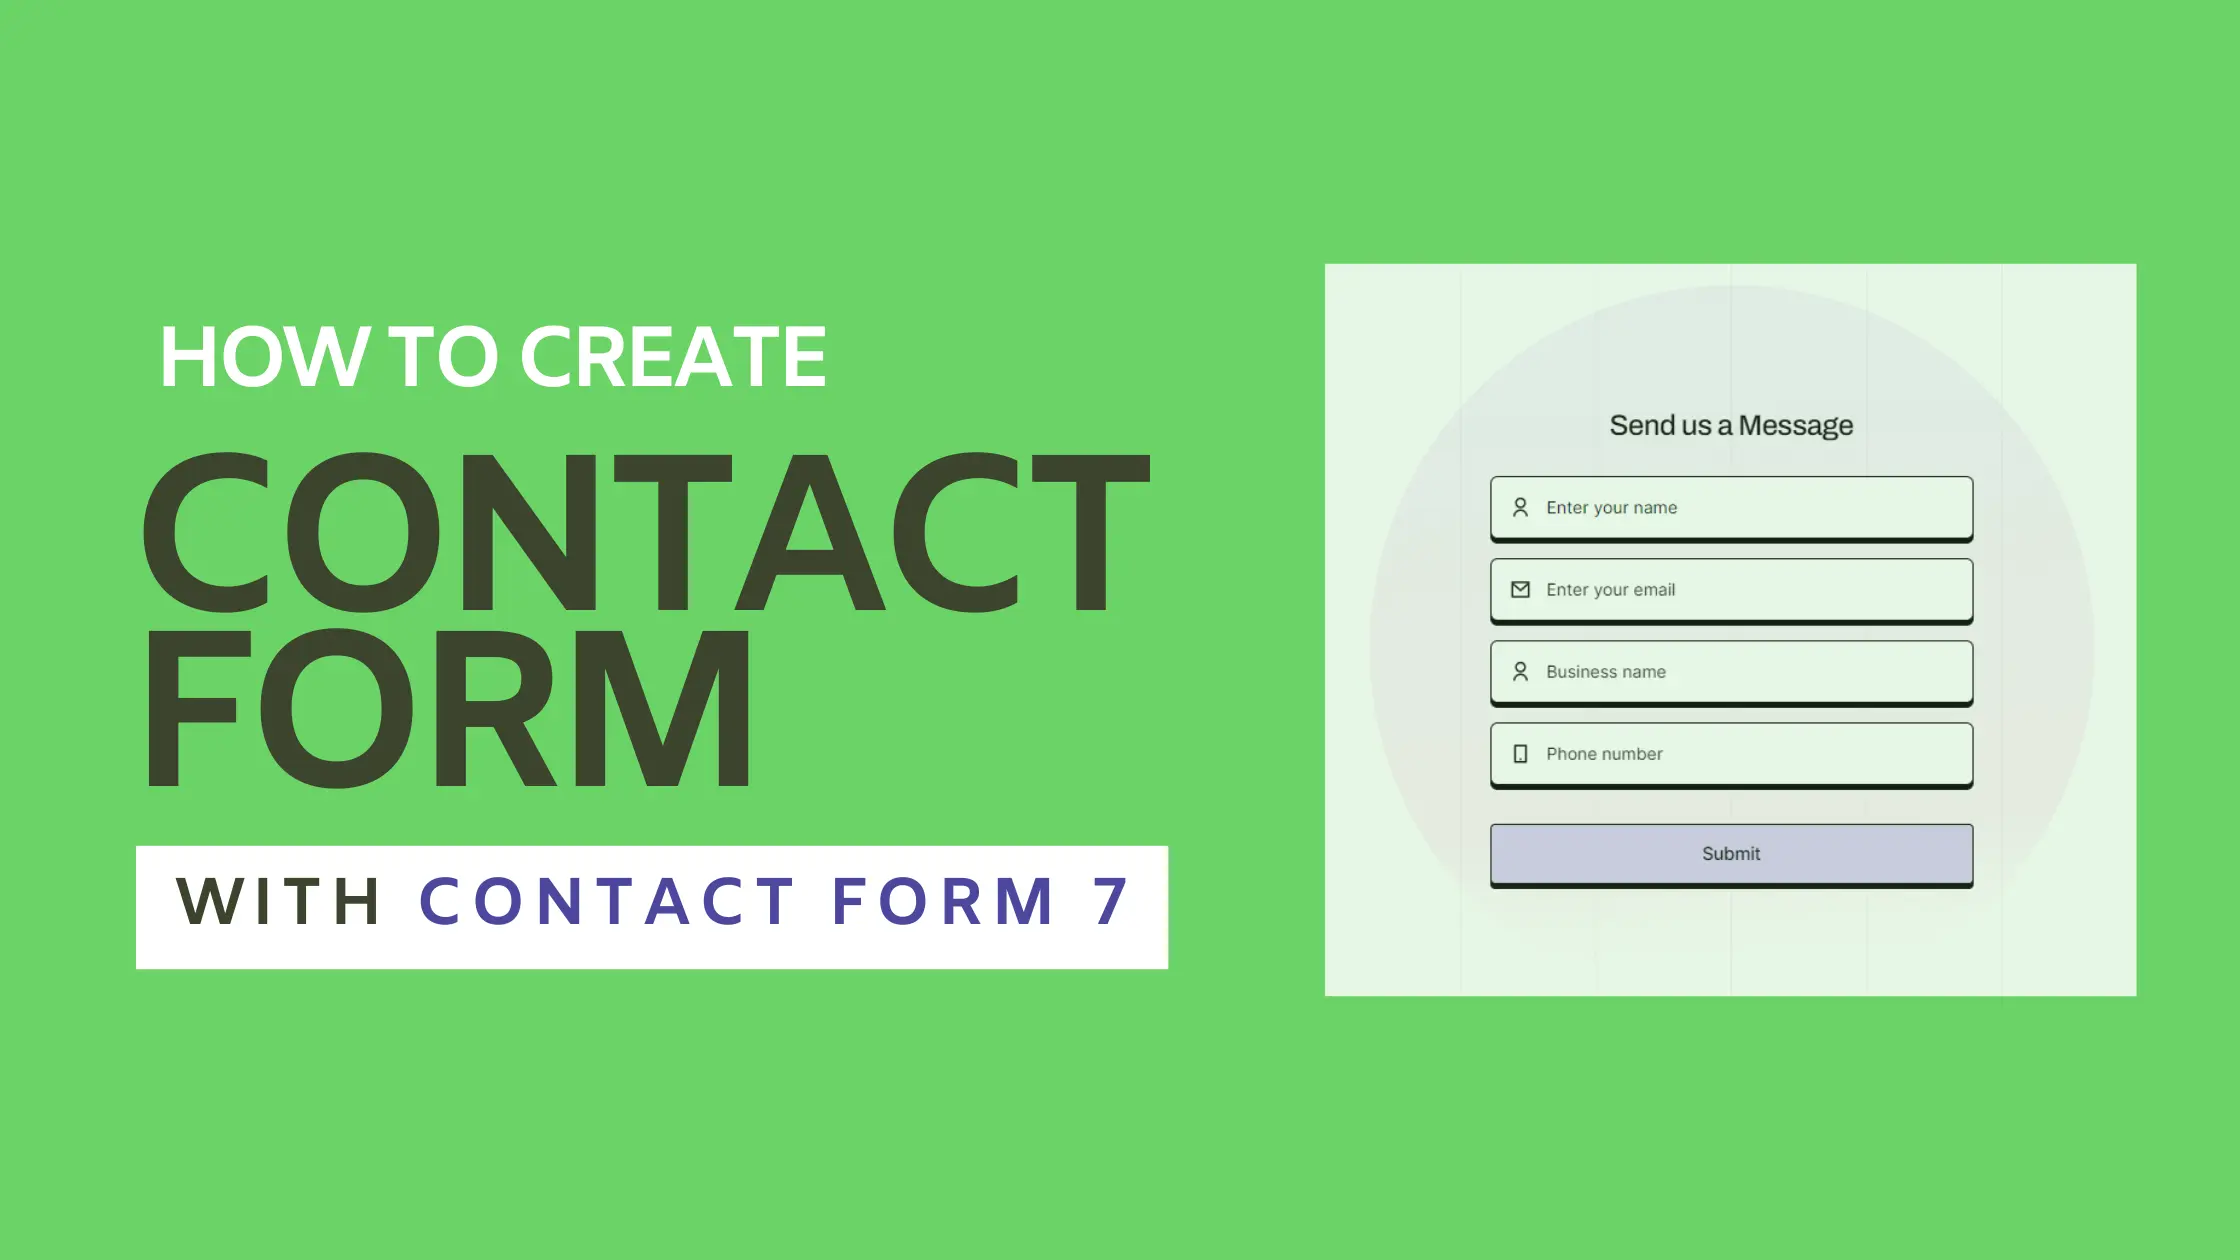
Do you want to add a contact form to your WordPress website? We got you covered. You will learn how to create a contact form in WordPress via Contact Form 7.
Contact Form 7 is your go-to plugin, if you are new to WordPress and have a not-so-complicated website, and want to display a simple contact form, then this is the plugin for you.
It has more than 5+ Million Active Installations, and above all, it’s a FREE Plugin.
Let’s get started!
Table of Contents
Install and Activate Contact Form 7
The first step is to install the Contact Form 7 plugin. You can Download the Contact Form 7 plugin from their official website or install it from your WordPress dashboard.
Follow the below steps if you are installing from WordPress.
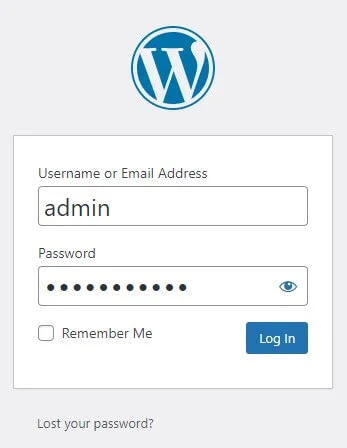
Step 1. Log in to your WordPress dashboard.
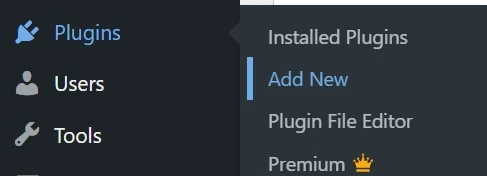
Step 2. Navigate to “Plugins” in the left-hand menu and click “Add New“.
Step 3. Go to the search bar, type “Contact Form 7” and press Enter.
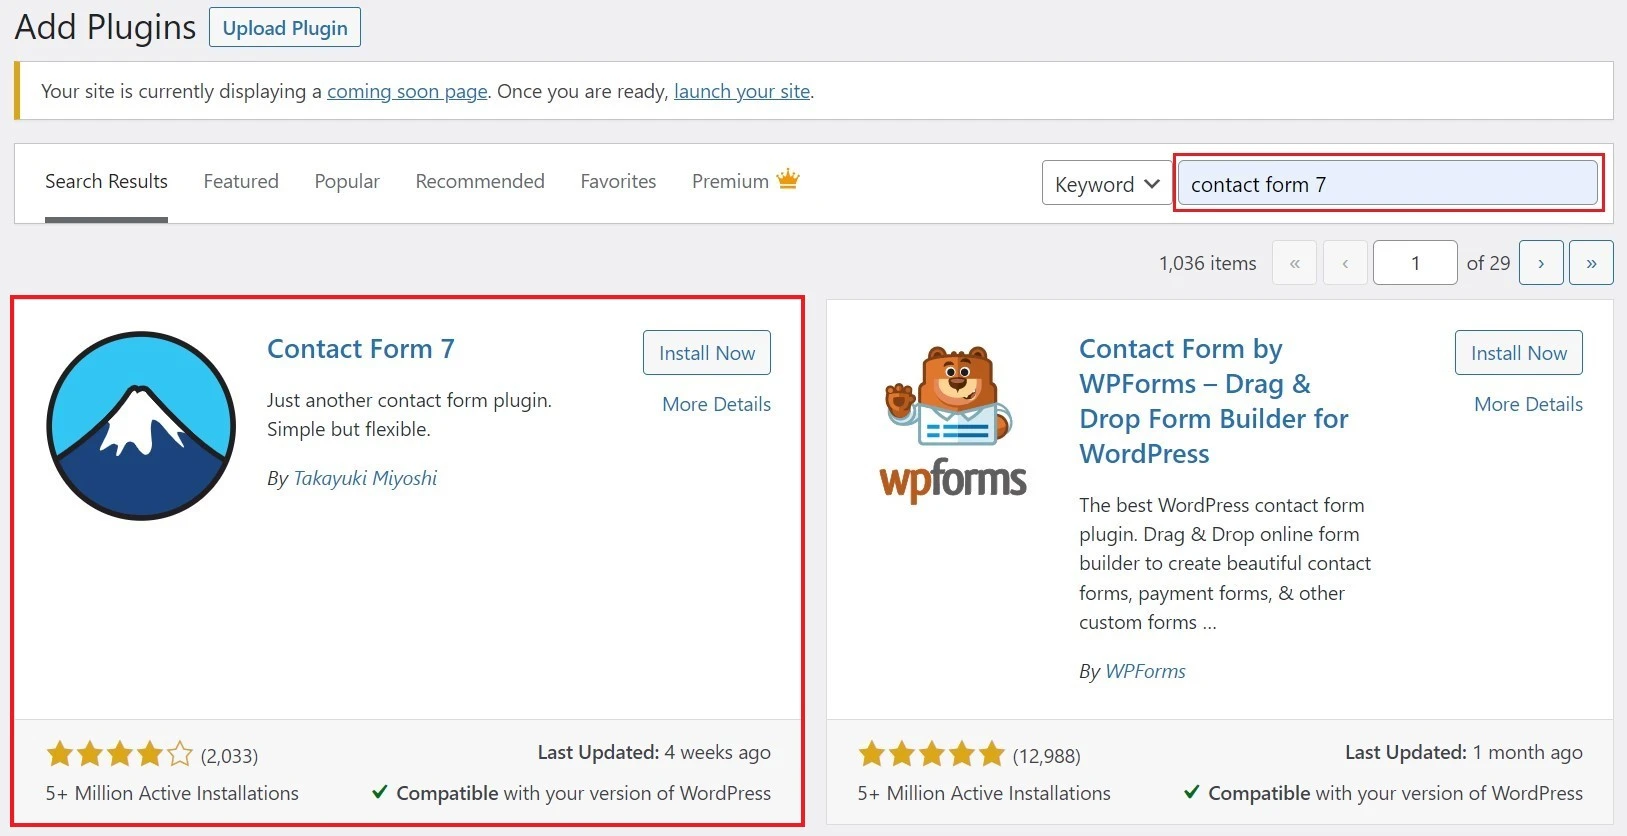
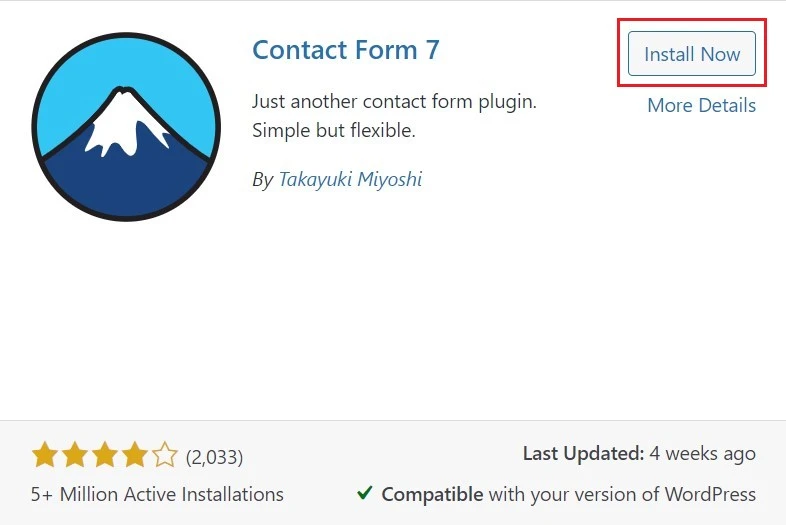
Step 4. Look for the Contact Form 7 plugin and click “Install Now“.
Step 5. Once the installation is complete, click “Activate” to activate the plugin.

The functionality of the plugin is found in your WordPress dashboard’s new “Contact” section once it has been activated.
Create a New Contact Form in WordPress
Now that you have installed and activated the Contact Form 7 plugin, you can create a new contact form.
Step 1. Go to your WordPress dashboard, select “Contact” in the left-hand menu and click “Contact Forms“.

Step 2. Click the “Add New” button to create a new form.

Step 3. You will get redirected to the form editor page. By default, a basic Contact Form 7 template will be displayed.
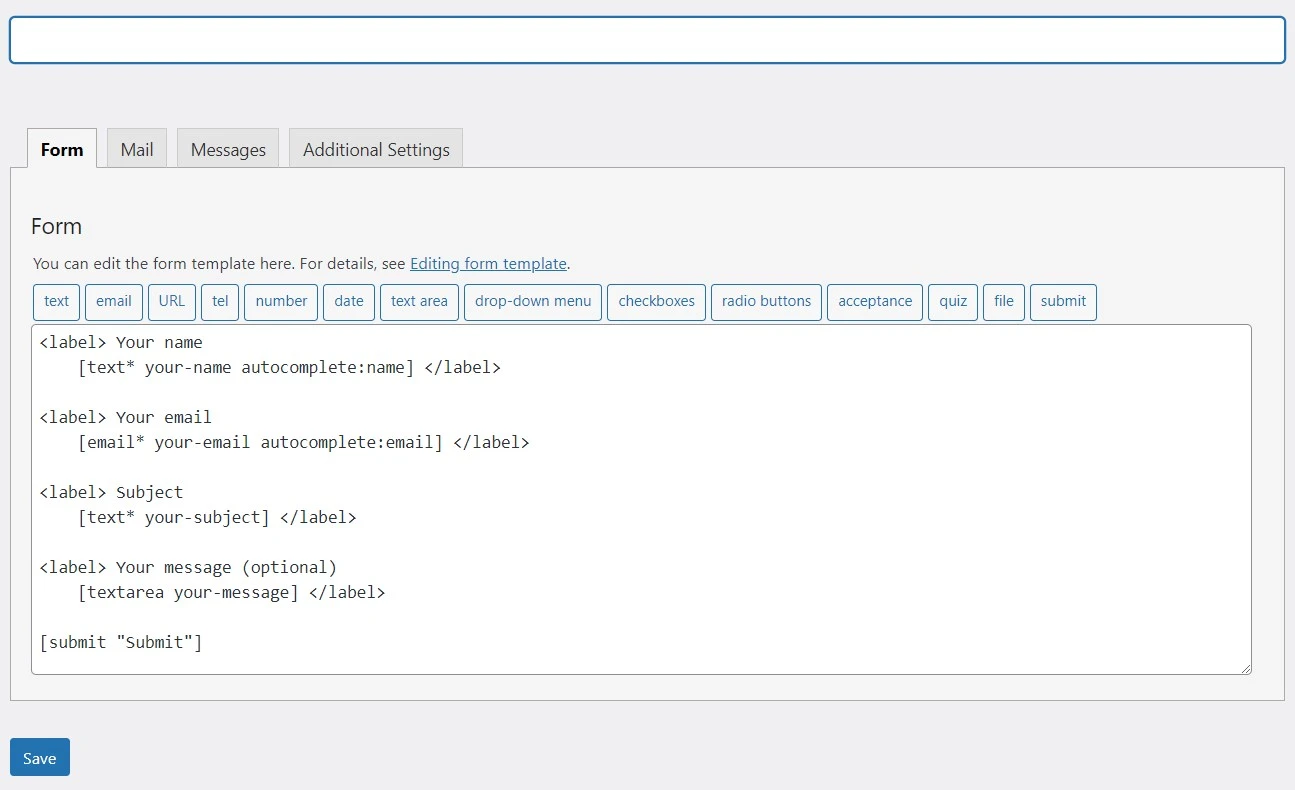
NOTE: Basic form fields like name, email, subject, and message will be automatically generated by the plugin. The majority of the time, you’ll want to keep these fields and, if necessary, add a few more depending on your needs.
Customize the New Contact Form
Customize the form according to your need.
Each form field has various settings that you can configure. Adjust these settings as needed.
Here’s how to do that:
First, give a name to your form.
We will keep the default form template and add a “subscribe to newsletter” checkbox field to it.
Select the “Checkbox” tag from the tags available in the form editor.

Click on the tag and a popup will appear.
In the popup, keep the default values.
Select the “Field Type” option to Required and add the values( Yes & No) in the “Options” field.
Select the “Make checkboxes exclusive” option and click “Insert Tag”.
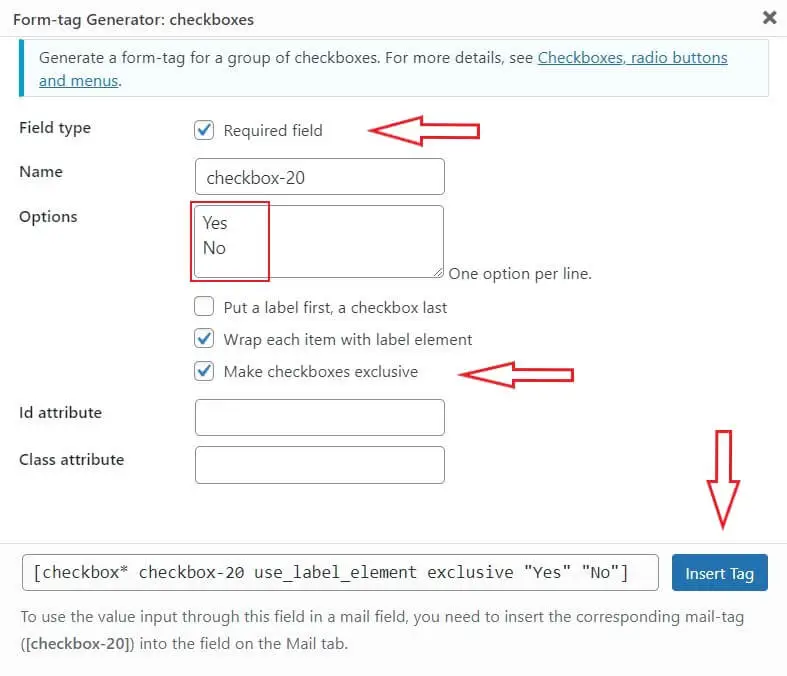
Now, add a label to your checkbox field. here’s how you should do it.
<label> Do you want to subscribe to our weaky newsletter </label>
  { Add you checkbox code here }
This is how it should look.
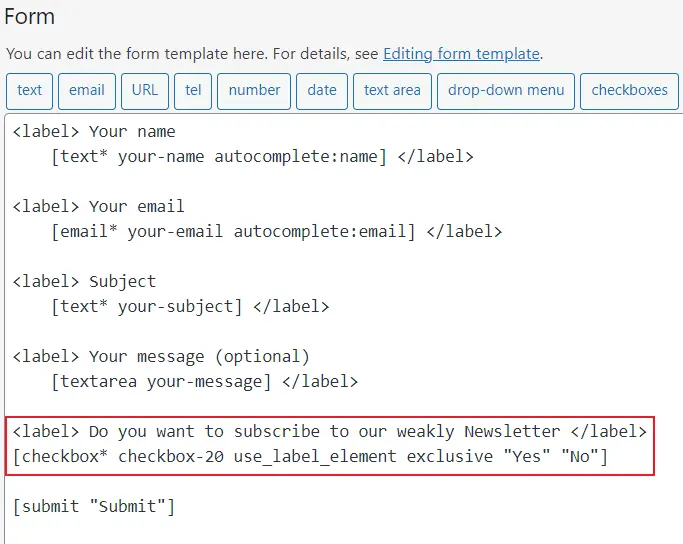
To understand the code, Let’s break down each value:-
[checkbox*]: This tells Contact Form 7 that it’s a checkbox field, allowing users to select one or more options. The “*” means that it’s a required field.
checkbox-20: Checkbox-20 is the name or ID of the checkbox field. It identifies the checkbox field and retrieves the selected value upon form submission.
use_label_element: This tells Contact Form 7 to use a label element for the form checkbox field.
exclusive: The exclusive attribute ensures that only one checkbox option can be selected at a time. If another option is selected, the previously selected option will automatically be deselected.
“Yes” and “No“: These are the specific options or values available for selection in the checkbox field. In this case, the options are “Yes” and “No”. Users can choose either option by checking the corresponding checkbox.
When a user submits the form, the value of the checkbox will be sent to the email address that you specify in the Contact Form 7 settings.
Once you have customized the form to your satisfaction, click the “Save” button to save your changes.
To see how your form will look you can check by following these steps to Publish and add the Contact Form to a Page.
Configuring the form for notifications and confirmation
Now that you have designed your form, it’s time to configure it. It is an important step, as it decides what happens after someone tried to contact you via the form. If the setup is done incorrectly, you will not get a notification when someone fills out the form.
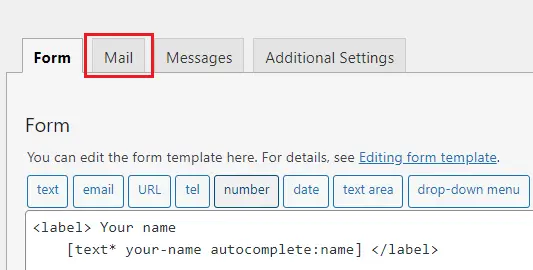
You will find the email settings in the Mail tab right next to the form editor tab.
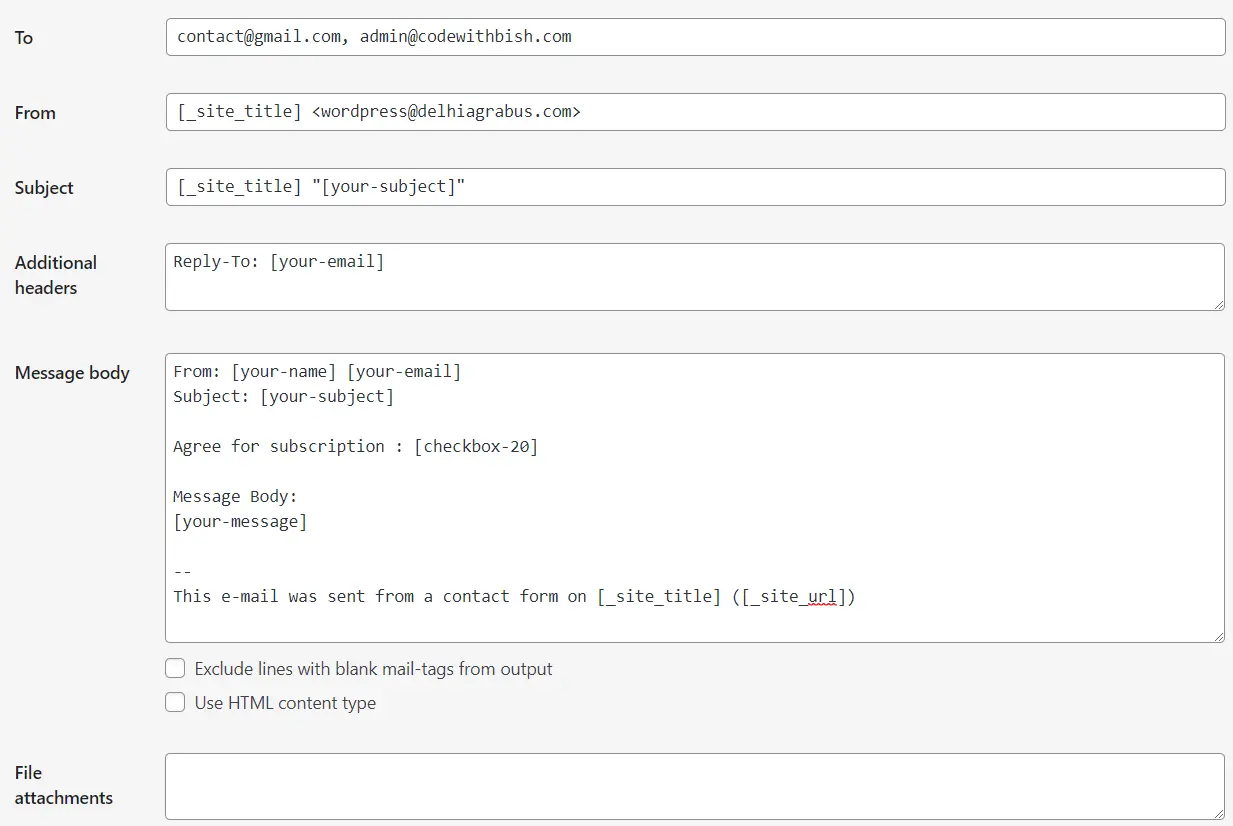
“To”: Specify the email address where you want the form submissions to be sent. It can be a fixed email address or something dynamic like the email address entered by the user in the form.
NOTE: If you want to add multiple email addresses, just add a “,” at the end of the first email address and put the new mail address after the comma.
“From”: Determine the email address that will appear as the sender of the email notifications. It can be a fixed address or dynamic, similar to the “To” field.
“Subject”: Set the subject line for the emails you receive when someone submits a form. You can include static text or dynamic values like form field inputs to make the subject more specific.
“Additional headers”: Add any extra email headers you want, like CC or BCC addresses or custom headers, if necessary.
“Message body”: The content of the email that you receive when someone submits a form. You can use regular text, HTML formatting, or include dynamic values from the form fields to personalize the message.
“File attachments”: If your form allows users to upload files, you can choose to have those files attached to the email notifications you receive.
Publish and add the Contact Form to a Page
Now that your form is complete, add it to a page and make it visible to your visitors.
To do so, follow the steps below:-
Copy the shortcode of the contact form that you want to use, simply by selecting Contact -> Contact Forms

Go to your page or post, wherever you want to add the contact form and paste the code and click publish/update.
Once your contact form is live, do a test to check if the form is working correctly.
The email address you selected in the Mail settings should receive your contact form response directly. Check your spam/junk mail first before beginning troubleshooting if your inbox is still empty.
This concludes our discussion of “How To Create Contact Form In WordPress Via Contact Form 7”.
Also Read: Awesome CSS Animations and Effects You Need to Know
Conclusion
Congratulations! Now you know how to create a contact form in WordPress using the Contact Form 7 plugin.
Contact Form 7 offers a wide range of customization options, making it a powerful tool for handling contact forms on your website.
By following the steps outlined in this tutorial, you can create personalized and effective contact forms to enhance communication with your visitors.
Regularly check your contact form to ensure it functions correctly.
Additionally, Contact Form 7 provides advanced features like spam filtering, file attachments, and integration with popular email marketing services.
Explore these options to further enhance the functionality of your contact form.
Remember to regularly monitor and update your contact form as your website evolves. You may want to add or remove fields, change the design, or modify the form’s behavior based on user feedback and business needs.
Whether you’re a blogger, business owner, or an individual looking to connect with your audience, having a contact form on your WordPress website is essential for building trust, fostering engagement, and opening the doors to meaningful interactions.
So go ahead and install Contact Form 7, create your customized contact form, and start connecting with your website visitors today. Happy form building!
Try other WordPress Contact Form plugins if Contact Form 7 is not the one for you.
If you have any questions you can let me know in the comments section or consult the official Contact Form 7 documentation, which provides comprehensive guidance and solutions for common troubleshooting scenarios.

